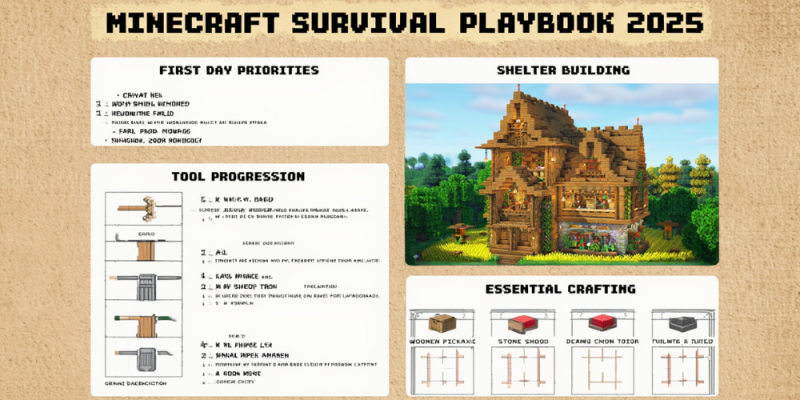
Start Strong in Minecraft: A Practical Survival Playbook

Minecraft is a sandbox game where you gather resources, build tools, and survive in a world full of mobs, caves, and surprises. You can play slowly and build a dream base, or rush to beat the Ender Dragon. This guide gives you clear, practical steps to feel safe, gear up fast, and enjoy the journey.
The tips use simple language and work on both Java and Bedrock. You will learn how to survive your first day, craft tools, mine ores, fight mobs, grow food, use villagers, enchant gear, and reach the Nether and the End. Keep this playbook near you and follow it step by step.
Game Modes and Goals
You can play Survival, Hardcore (Java), or Creative. In Survival, you start with nothing and must collect materials to live. Your short-term goals are food, shelter, and basic tools. Your long-term goals can be anything: explore biomes, make automatic farms, or defeat bosses like the Wither and the Ender Dragon.
Set a simple plan for each world. For example: “Safe starter house by Day 1, iron tools by Day 2, diamond gear by Day 3, Nether by Day 4.” Small goals keep you moving and reduce random deaths.
First Day: Tools, Food, and Shelter
- Punch a tree, craft wooden planks, a crafting table, and sticks.
- Make a wooden pickaxe, mine stone, then upgrade to stone tools right away.
- Craft a furnace for food and smelting. Cook meat or bake bread.
- Make a bed from three wool + three planks to skip the night (or set spawn).
- Build a small starter shelter: a door, some torches, and a chest for storage.
- Priority item: a shield (1 iron + 6 planks). A shield blocks skeleton arrows and creeper blasts.
If you cannot find sheep, dig a 2x1 hole and wait the first night, or stay inside and mine a little staircase to gather stone and coal.
Crafting Basics That Matter
- Crafting table: turns simple materials into tools and gear.
- Stone tools: stone pickaxe, axe, shovel, sword (or axe for Java combat).
- Torches: sticks + coal/charcoal; light prevents hostile mob spawns.
- Food: wheat (seeds from grass), bread, cooked meat, or baked potatoes.
- Buckets: carry water and lava; a water bucket saves you from falls and fire.
Learn a few lifesaver recipes early: shield, bucket, boat, and a stack of torches. Keep tools in the same hotbar slots to build muscle memory.
Mining and Ore Progression
Minecraft’s caves are rich but dangerous. Move carefully and place torches as you go. Use these simple rules:
- Branch-mining: Dig a main tunnel 2 blocks high, with side tunnels every 2–3 blocks.
- Staircase: Use a safe 1x2 staircase down; never dig straight down.
- Torch rule: Place torches on the right going in; when they are on your left, you are heading out.
Where to find key ores (1.18+ terrain)
- Coal: Common in mountains and higher Y levels; visible on cliff sides.
- Iron: Often around Y=16 and in caves; also common in high mountains.
- Copper: Common between Y=48 and -16; useful for building and lightning rods.
- Gold: More in badlands biomes; also below Y=0 in deep caves.
- Diamond: Best below Y=-54 to -59 in deep slate layers; watch for lava pools.
- Redstone: Below Y=0; essential for automation.
- Lapis: Mid to low levels; use for enchanting.
Bring an iron pickaxe for redstone, gold, and diamond. Mine around ores to check for lava. Keep a water bucket on your hotbar. Fortune III increases ore drops; Silk Touch lets you move blocks safely. Choose one for your main pick and carry a second pick for the other job if you can.
Food, Farming, and Basic Villages
Stable food makes the game calm. Start simple and grow over time:
- Early: Cooked meat (cows, pigs, sheep), bread from wheat, or baked potatoes.
- Farms: Plant wheat, carrots, potatoes near water; use a hoe and torches so crops grow at night.
- Animals: Pen cows, sheep, pigs, and chickens. Use wheat for cows/sheep, carrots for pigs, seeds for chickens.
- Useful items: A composter turns extra seeds into bone meal for faster growth.
If you find a village, claim a bed, loot basic chests, and replant crops. Villages are great for early food and for trading later.
Building a Safe Base
Your first base should be simple, bright, and organized. Add layers as you progress.
- Light everything: Place torches inside and around your base to stop mobs from spawning.
- Fences and gates: Keep animals in and mobs out. A small moat or wall also helps.
- Storage: Use labeled chests (wood, stone, ores, food, mob drops). Order saves time.
- Map and bed: Set your spawn and keep a map or coordinates visible.
- Safety gear: Keep a water bucket, extra food, and spare tools in a chest near the door.
Combat and Mob Safety
Combat is easier with a shield and light. Follow these tips:
- Skeletons: Hold your shield, walk close between shots, then strike.
- Creepers: Block the first blast with a shield or hit and back away; repeat.
- Zombies: Kite backwards and time your swings; they are slow but can swarm.
- Spiders: Fight in spaces 2 blocks high; they jump less effectively.
- Endermen: Don’t look at their eyes. Fight under a 2-block-high roof if needed.
Use critical hits by jumping and striking while falling (Java). In caves, place torches often, block off open areas with cobblestone walls, and carry milk for status effects if you plan to fight witches.
Villagers and Trading (Your Upgrade Shortcut)
Villagers can give top-tier items without heavy grinding. Learn the basics:
- Jobs: Place a workstation next to a villager to set a job (lectern for librarian, fletching table for fletcher, etc.).
- Trading loops:
- Fletcher: Sticks for emeralds (turn logs into sticks).
- Farmer: Crops for emeralds; also sells golden carrots (great food).
- Librarian: Books for enchantments like Mending and Unbreaking.
- Lock trades: Trade once to “lock” a villager’s offers, so they keep the job and books you want.
With a few villagers, you can buy diamond-level gear (armorer, toolsmith, weaponsmith) and key books (Mending, Protection IV, Efficiency V). This is often safer than hunting everything in caves.
Enchanting and Gear Progression
Enchanting makes your tools and armor last longer and work faster. You need experience (XP), lapis, and an enchanting table.
- Enchanting table: 4 obsidian, 2 diamonds, 1 book. Place it with 15 bookshelves around (one block away) for level 30 enchants.
- Best armor enchants: Protection IV, Unbreaking III, Mending, Feather Falling IV (boots).
- Best tool enchants: Efficiency V, Unbreaking III, Mending, Fortune III (or Silk Touch on a second pick).
- Weapons: Sharpness V (or Smite for undead), Looting III, Sweeping Edge (Java), Power V for bows.
Use an anvil to combine books and items. Mending uses XP to repair your gear; with Unbreaking III, tools last a very long time. For XP, build a simple mob farm, breed and cook animals, or mine quartz in the Nether.
Exploration, Nether, and The End
Exploration
- Bring: food, bed, compass (or remember coordinates), torches, water bucket, spare tools.
- Maps: Craft with paper; add a compass for locator maps. On Java, F3 shows coordinates; on Bedrock, enable them in settings.
- Loot: Shipwrecks, ruined portals, desert temples, and mineshafts have good loot. Be careful with TNT traps in temples.
Nether
- Portal: Obsidian frame lit with flint and steel. Wear gold armor to reduce Piglin attacks.
- Goals: Blaze rods (fortress), Nether wart (potions), quartz (XP), and ancient debris (for netherite).
- Safety: Bring blocks, a bow, fire resistance potions if possible, and a warped fungus on a stick to control striders over lava.
- Ancient debris: Common around Y=15 in the Nether. Mine carefully; TNT beds can help but are risky.
- Travel: In the Nether, 1 block equals 8 blocks in the Overworld. Great for long-distance travel.
The End
- Eyes of Ender: From blaze powder + ender pearls. Use them to find the stronghold.
- Dragon fight: Bring a bow, blocks, buckets, and beds (advanced tactic) or simple arrows to break crystals.
- After victory: Explore End Cities for elytra and shulker shells. Use slow falling potions and a water bucket to survive falls.
Redstone Basics for Everyday Use
Redstone lets you automate simple tasks. Start small:
- Power sources: lever, button, pressure plate.
- Wiring: redstone dust carries power; repeaters extend it and add delay.
- Simple builds:
- Auto door: pressure plates on both sides.
- Sugar cane farm: observer + piston to harvest automatically.
- Item sorter: hoppers, comparators, and chests to organize storage.
Learn by testing in a small area. Redstone looks complex, but many daily builds use only a few parts.
Performance and Settings
- Lighting: Place many torches to reduce mob spawns and lag from pathfinding.
- Render distance: Lower it if your FPS drops, especially in the Nether or large bases.
- Java: Use performance mods (like optimization clients) if your server allows. Allocate memory wisely; too much or too little can cause lag.
- Bedrock: Turn off fancy graphics if needed; lower simulation distance to help performance.
Multiplayer: Playing With Others
- Respect builds: Don’t break or take without asking. Follow server rules about PvP and claims.
- Safety: Hide your base on public servers, and keep backup gear in a secret chest.
- Trading: Share crops, books, and mob drops. Everyone progresses faster together.
Daily Checklist (Quick Routine)
- Morning: Harvest farms, breed animals, smelt ores, organize chests.
- Day: Mine or explore one clear goal (diamonds, fortress, stronghold).
- Evening: Enchant or combine books, expand storage, light up new areas.
- Always: Carry food, tools, torches, and a water bucket. Set your spawn before risky trips.
Conclusion
Minecraft becomes easy and fun when you follow a few steady habits: plan your day, carry safety tools, light up your world, and build your gear step by step. Use villagers for fast upgrades, enchant your tools, and learn the Nether and End at your own pace. With this playbook, you will survive longer, explore more, and finish bigger projects with less stress.
- Learn one home base, one mine route, and one village for trading.
- Keep a shield, water bucket, food, and torches on your hotbar.
- Enchant early: Unbreaking, Mending, and Protection change everything.
- Light your area and label your chests to stay organized.
- Take small risks with a clear plan, and set your spawn before every adventure.
Start small today, improve one thing each session, and soon your world will be full of safe tunnels, smart farms, and beautiful builds.


